Code on Canvas
What is Code on Canvas?
pen.dev uses the Script node to bring code to the canvas. Drop one onto the canvas, point it at a .js file, and the script’s output renders as nested layers — pie charts, grids, decorative patterns, anything you can describe in code.
Use it whenever a design needs structure that’s tedious to build by hand: things driven by data, repeated with variations, or parameterized by a few knobs you want to tweak interactively.
Getting Started
Create a script node
- Open the Shape tool dropdown in the toolbar.
- Pick Script (the
</>icon). - Click anywhere on the canvas to drop a 200×200 script node.
The new node will show a green “No script file selected” placeholder until you point it at a .js file.
Link it to a .js file
In the properties panel, type a path into the script field. Paths are resolved relative to your .pen file, so a sibling file is just chart.js. Save the JS file in the same folder as the .pen file (or any subfolder) and reference it from there.
You don’t need to write the script by hand. Two easy starting points:
- Grab a ready-made script. Browse highagency/pencil-scripts for example scripts maintained by the pen.dev team (charts, grids, patterns, and more) and drop them next to your
.penfile as a starting point. - Ask the AI agent. Open the agent panel and describe what you want — it will create the
.jsfile for you and link it to the selected script node.
Example prompt:
Create a script that renders a horizontal bar chart with 5 bars.
Add inputs for the bar color, gap between bars, and an array of values.
A minimal script looks like this:
/**
 * @schema 2.11
 *
 * @input columns: number(min=1) = 3
 * @input color: color = #3B82F6
 */
const cols = Math.floor(pencil.input.columns);
const cellW = pencil.width / cols;

const nodes = [];
for (let c = 0; c < cols; c++) {
  nodes.push({
    type: "rectangle",
    x: c * cellW,
    y: 0,
    width: cellW - 4,
    height: pencil.height,
    fill: pencil.input.color,
  });
}
return nodes;
Here’s that exact script rendered inside a 200×200 script node:
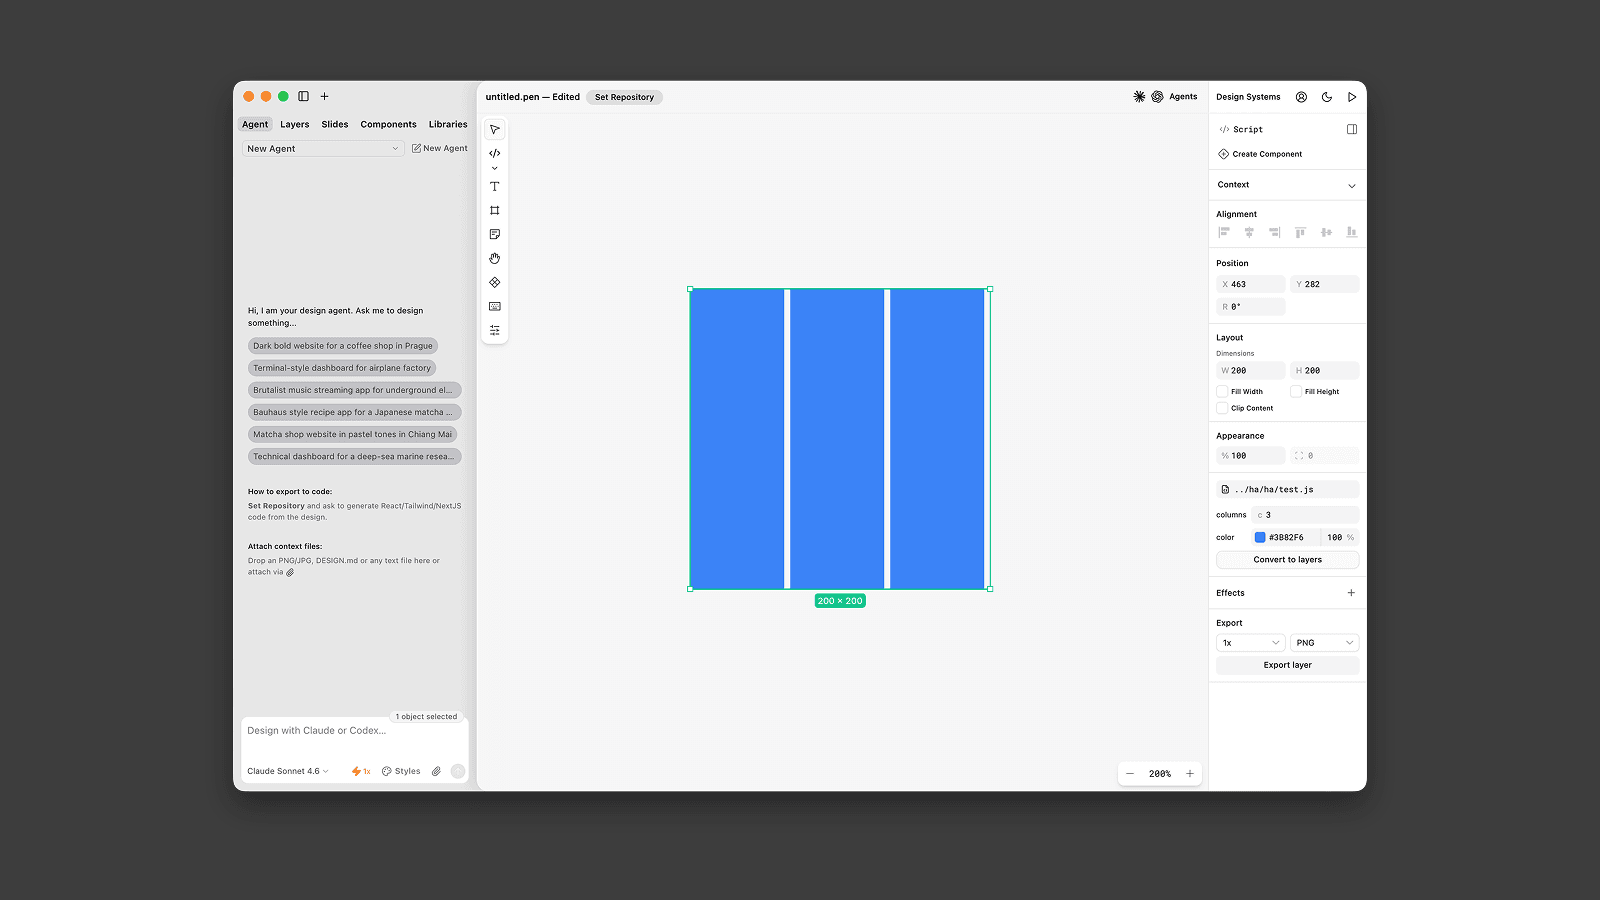
As soon as the file resolves, the script runs and its output appears inside the node’s bounds.
Tweak it on the canvas
- Resize the node — drag the handles to resize the node, or change the size in the properties panel. The script re-runs and the layout reflows live.
- Use the input controls — every
@inputline in the script header becomes a control in the properties panel. Numbers, strings, booleans, colors, enum dropdowns, and references to existing components are all supported. Editing a control re-runs the script instantly. - Edit the
.jsfile — pen.dev watches the file on disk. Save in your editor and the canvas updates without a reload. - Convert to layers — whenever you need to edit the generated content by hand, click the button at the bottom of the properties panel. The script node is replaced with a regular frame containing a snapshot of the generated layers.
Bind a script input to a variable (like $primary) and the script automatically picks up theme changes.
How it Works
A few details worth knowing:
- The
.jsfile lives outside the.penfile. The script node only stores a path to it. Multiple script nodes can point at the same file; each gets its own size and input values. - Inputs are declared in the file header. The
@inputlines in the header comment tell pen.dev which controls to render in the properties panel. Rename or remove an input in the file and the panel updates. - Scripts return an array of nodes. Each returned object uses the same schema as the rest of pen.dev and is inserted as a child of the script node.
- Output is derived state. Generated children re-render every time the script runs and are not part of the undo history. To turn them into editable layers, use Convert to layers.
- Scripts run in a sandbox. They don’t have access to the DOM, network, or filesystem, and must run synchronously (no async, no
setTimeout). Math.random()is deterministic. It is reseeded on every run, so the same inputs always produce the same output.
Errors and missing files are shown directly on the node, with the failing line of code highlighted — no need to open a console.
API Reference
File header
Every script starts with a header comment declaring its schema version and the inputs it exposes.
/**
 * @schema <version>
 * @input <name>: <type>[(<args>)] [= <default>]
*/@schema— required. Use2.15(current schema version).@input— zero or more. Each one becomes a control in the properties panel. The name is also the key used onpencil.input.
Input types
| Type | Example | Notes |
|---|---|---|
number | @input size: number(min=0, max=100) = 10 | Optional min / max named args clamp the value before the script runs. |
string | @input label: string = "Hello" | Multi-line text in the panel. |
boolean | @input filled: boolean = true | Rendered as a checkbox. |
color | @input fill: color = #3B82F6 | Hex literal or a quoted string. |
enum | @input layout: enum("grid", "stack") = "grid" | Positional list of quoted options, rendered as a dropdown. |
ref | @input target: ref | Reference to a reusable component, picked from a thumbnail grid. |
The pencil global
Your script body runs with a single pencil argument:
| Field | Type | Description |
|---|---|---|
pencil.width | number | Current width of the script node. |
pencil.height | number | Current height of the script node. |
pencil.input.<name> | matches the @input type | Current value of the named input (already clamped and validated). |
Return value
- The script must
returnan array of node objects. Each object follows the .pen format. - A script can return at most 1000 nodes and must finish within 2 seconds.
Example
/**
 * @schema 2.11
 *
 * @input rows: number(min=1, max=20) = 5
 * @input gap: number(min=0) = 6
 * @input fill: color = #10B981
 * @input rounded: boolean = true
 */
const rows = Math.floor(pencil.input.rows);
const gap = pencil.input.gap;
const rowH = (pencil.height - gap * (rows - 1)) / rows;

const nodes = [];
for (let r = 0; r < rows; r++) {
  nodes.push({
    type: "rectangle",
    x: 0,
    y: r * (rowH + gap),
    width: pencil.width,
    height: rowH,
    cornerRadius: pencil.input.rounded ? 8 : 0,
    fill: pencil.input.fill,
  });
}
return nodes;